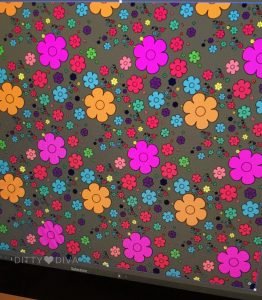
It’s circa 2010, and I’m doodling in Corel Xara X, trying to figure out how to make repeat patterns. I had the idea of selling digital papers I had seen on Etsy. I could create simple repeats, but I grew frustrated when trying to figure out how to do a half-drop repeat. I soon concluded that I needed to find a course or someone who could teach me.
There was a Surface Design and Textiles course in the North East region, but I couldn’t afford to undertake a second Bachelor’s degree then (or now). However, I did stumble across the first iteration of the now-defunct Make It In Design courses, established by surface pattern designer Rachael Taylor. With some trepidation, I enrolled in the first Module… and froze.
The course highlighted what I couldn’t articulate at the time: despite being for beginners, I found many people who already had their own artistic style. At the time, this made me feel inadequate, and I struggled to complete the course as I felt like I wasn’t up to scratch.
Truth was, I wasn’t.
Over 12 years later, looking back on those first patterns I made with Xara X and that first online learning experience, I was discouraged by the lack of skills in industry-used software and in my own design skills.
Knowing what I know now, I can see these experiences as stepping stones to becoming the emerging surface pattern designer I am today.
Picking Up Surface Pattern Design… again
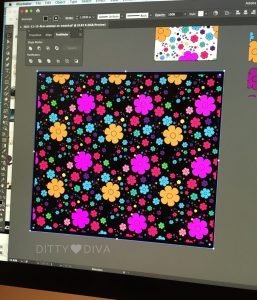
Circa 2020/21, a couple of short courses helped me build my confidence. I also started to invest in the technology and software the industry uses for surface pattern design. An iMac and a subscription to Adobe Illustrator – after years of battling with InkScape and GIMP (the free versions of Illustrator and Photoshop, respectively).
These courses were great at getting me started again in designing pretty patterns. Being able to follow along at my own pace, and it was exciting to see my designs come to life on the screen.
For a while, I stumbled from short course to short course through Skillshare and Domestika. Then I took a deep breath and enrolled in Oksancia (Oksana Pasishnychenk’s) Magical Layout Patterns course. It was during a difficult period for our family, so I wasn’t able to dedicate as much time as I would have liked to learning.
Skip forward another few years, and I signed up for Polina Oshu’s Pattern Camp in 2024, which I loved. The short course really helped me to focus on the drawing side of things. Importantly, it was a lovely gateway into the surface pattern design community and what was possible.
Yet, I was beginning to feel that familiar frustration, which I now take as a sign that I am ready for the next step. It was great doing all the Skillshare and Domestika classes, but I couldn’t help feeling I was stabbing in the dark of the surface pattern industry and had no clue where to look. I was also frustrated with my limited skills in Adobe Illustrator.
Making the biggest investment in my surface pattern journey To Date
Fast-forward to the beginning of 2025, Bonnie Christine’s Immersion course was launching once again. I had stumbled across Bonnie Christine’s Immersion course many years before, but it was too much of an outlay at the time. After a difficult few years, I wanted to do something for myself. It was a scary moment hovering the mouse over the Buy Now button, even scarier when debating with myself whether to add the small-group element to the overall cost.
Thank goodness, I did. Yes, it was a massive financial investment, but goodness, it consolidated the 12 years of my own attempts at surface pattern design. Immersion takes you right from scratch – or whichever part of the surface pattern design journey you find yourself on. The classes were easily digestible and a masterclass in breaking down complex topics and concepts. On top of this, the course really strengthened my Illustrator skills and built my confidence in using the software.
The icing on the cake? That small group element? I met four other fabulous ladies who love and appreciate pattern design too. It was a brilliant way to stay accountable and cheerlead each other throughout the course (imagine lots of positive “ooooohhs” as we each shared our work!). The best bit: we still meet weekly to talk about patterns and encourage each other on this journey.
As we reach the end of 2025
Life gets busy, pattern design creation has gone down the list of priorities, and I haven’t been able to dedicate as much time as I would like to my design practice due to other professional, family and health commitments. However, I am proud of myself for where I am today with my surface pattern skills, even if I’m not where I hope to be yet!
2025 Surface Pattern Design Achievements
Reflecting on my achievements in 2025 – I’m proud that I have:
- …completed the Immersion course.
- …redesigned and set up this website for my surface pattern design brand.
- …picked up my Dity Diva Instagram account again – and started to promote my work.
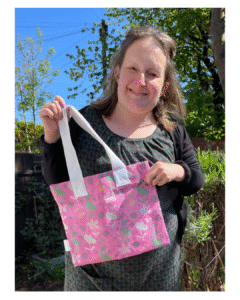
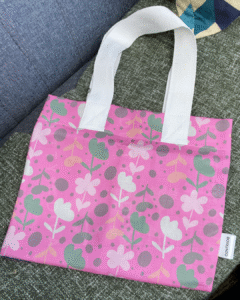
- …had one of my prints added to a tote bag from a print-on-demand website – the thrill of seeing my own designs on fabric was brilliant and made the possibility of being able ot see my patterns on things feel more real.
Surface Pattern Design Courses I Have Taken
It’s taken quite a bit of investment – money and time – to get to this point. Below is a list of surface pattern design courses over the years that have helped me gain the skills needed to be a surface pattern designer:
Domestika Surface Pattern Courses
- Textile Pattern Design for Home Interiors – Tatiana Nedialkova,
- Botanical Patterns in a Sketchbook: Conquer the Blank Page – Polina Oshu
- Fundamentals of Pattern Design – Michelle Parascandolo
- Pattern design for homeware products – Elizabeth Olwen
Skillshare Surface Pattern Design Courses
- Pattern Recipes: How to Create Pattern Templates You Can Reuse – Shannon McNab
- Stronger Patterns Made Easy – Shannon McNab
- Create a Modern Trailing Floral Pattern in Adobe Illustrator – Mel Armstrong
- Surface Pattern Design by Hand: Create a Repeat Pattern on Paper – Di Ujdi
- Anyone Can Start a Sketchbook! How to Draw Happy Florals & Botanicals – Kristina Hultkrantz
- 10 Ways to Make Better Patterns – Liz Kohler Brown
- Design Your Own Washi Tape in Adobe Illustrator – Rebecca Woolbright
- Make Simple Geometric Shapes in Adobe Illustrator CC – Esther Nariyoshi
- Intro to Surface Pattern Design: Learn Adobe Illustrator – Bonnie Christine
Further Courses
- Make It In Design – now defunct.
- Oksancia – Oksana Pasishnychenko’s – Magical Pattern Layouts and Pattern Up! courses in the Oksancia Textile Design Studio and School.
- Pattern Power – Laura Coyle
- Polina Oshu – Pattern Camp – Polina’s classes can now be found over on Patreon.
- Immersion – Bonnie’s Christine’s legendary surface pattern design course.
- One Motif, Endless Patterns – The Pattern Social
What’s Next For My Surface Pattern Design Journey?
One of the big lessons I’ve learnt on my surface design journey is that it takes time. Time to learn the software and technical skills to design and create the patterns. Time to develop your signature style. Time to become confident in your designs and figure out where you want your patterns to be seen.
It’s taken me over 12 years to get where I am today as a surface pattern designer. I’ve navigated getting married, starting a family and overcoming health crises. In 2025, I am a parent/carer, and it’s more important than ever to me to build a career around the responsibilities I now have. Surface pattern design provides much-needed respite from the day-to-day tasks of caring for a child with a chronic condition. Being able to take time for myself to design something pretty that brings me and others joy is priceless.
It’s the beginning of November 2025 as I write this post, and I am eyeing the steps I would like to take as I continue my path as a surface pattern designer.
In 2026, I would like to:
- Make pattern creation a daily practice — it could be doodling, painting, or cracking open Illustrator.
- Learn more about colour theory and put this into practice. I would love to figure out the colours and patterns for Ditty Diva.
- When I started Immersion, I set a goal to open my own online stationery shop. I want to create a collection that I could apply and sell, particularly washi tape and notebooks.
- Sell my colouring pages – and launch Pretty Pattern Colouring Club properly. It’s an idea I’ve had in my head for a long while now. It’s time to make it happen.
- Learn how to draw more shapes and figures. I’ve been frustrated with my lack of skills in this area and feel it would widen the types of patterns I could design.
- Work on my mindset around my work being good enough. I’m still working on this, over 12 years after taking that first paid course.
- Save up the money to join the next enrollment of Bärbel Dressler’s ‘Repertoire’ course, which studies pattern design more in-depth.
What’s your journey looked like?
One of the things I’ve learnt from meeting other surface pattern designers is that we all have our own journeys into this profession. Mine has felt like it’s taken ages at times. Yet when I reflect on this journey, I realise it has walked alongside me in the different seasons of my life. I can’t wait to see where it takes me next.
How about you? Where are you on your surface pattern journey? What advice would you give aspiring surface pattern designers starting? Share your thoughts in the comments.